
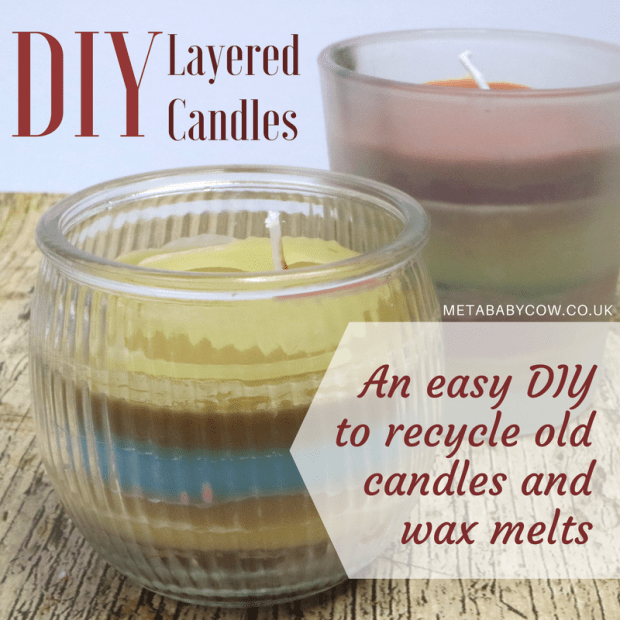
Do you want to know how to recycle those odd bits of wax – ends of candles, wax melts that don’t smell any more – into lovely layered candles you can burn through?
Of course you do – that’s why you clicked on this post…!
This is an easy DIY that does not use an open flame or anything hot enough to really burn you – however I would recommend it is performed under adult supervision, as there is heat, molten wax and sharp objects involved. Be safe kids (and adults)!
First thing’s first – let’s collect our materials…

1. A wax warmer / melter

This is for melting down your wax – duh. Mine is an old-style electric hotplate 20watt Glade Wax Warmer in Cream. You can buy these on Amazon – I got mine for £3.50! You can also use a tea light or bulb warmer if that’s what you have.
If you are using an electric warmer, you will also need a power source within reach to plug it in.
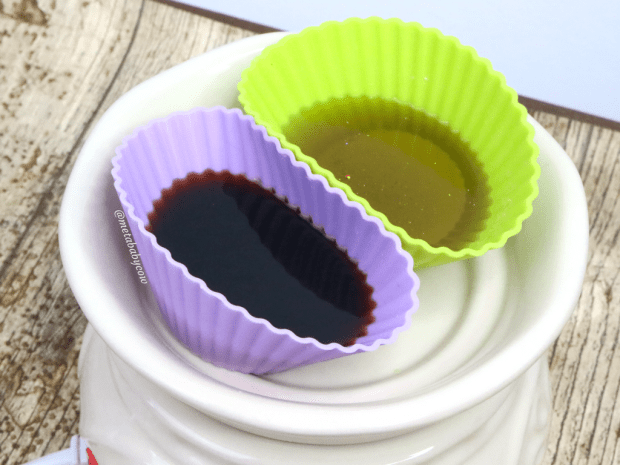
2. Silicone Cupcake Baking Cases

These are to pop into your warmer and melt your wax in – I can fit two at a time in my warmer. Mine are from eBay but you can get them anywhere that sells baking equipment. They’re easier to pour molten wax from, easier to clean, and the non-stick coating helps the wax to run right off. I also use these as moulds to pour my old wax melts into when they’re still liquid, which is why you’ll see some wax later that looks like Reese’s Pieces.
You can attempt this DIY without these, but it will increase your cleanup as well as wasted wax. Don’t say I didn’t warn you…
3. Empty Candle Jars
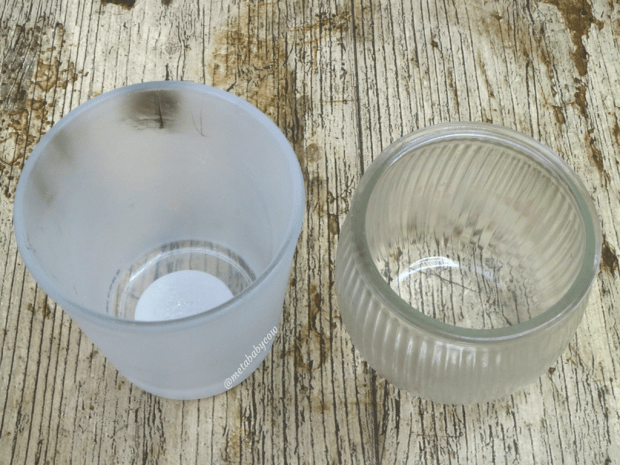
I would recommend buying jars specifically sold for candle-making – that way you can be sure you’ll be safe when burning them. I personally like to live life a bit on the edge so I’ve reused some old candle jars. To clean out the last of the wax and any glue sticking down the wick, you can put them on top of a hot warmer for a few minutes to melt it – they pop right out.
Please don’t use jars from your kitchen (e.g. from jam or pasta sauce) – these aren’t designed to withstand heat and could crack while lit. Don’t burn your house down over a candle jar!
4. Candle Wicks

Without these, you won’t be able to light your candle. Mine are 15cm long, pre-waxed and come in a pack of 50 – I got them from Amazon.
5. Wicking Pins
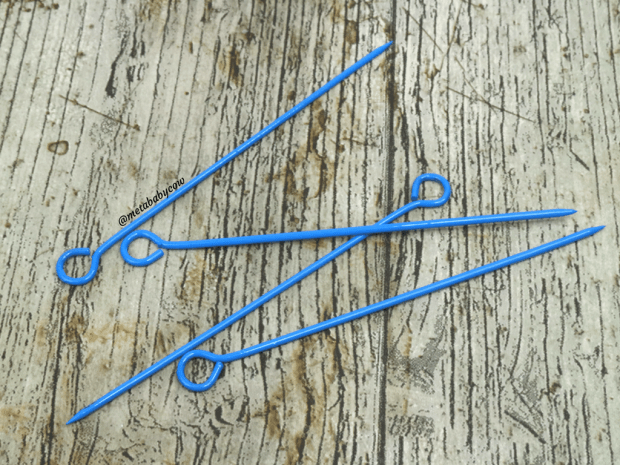
These are to keep your wicks straight while the wax sets around them. You can try without, but it’s super fiddly! I got mine from Amazon – they’re reusable, so you’ll only need to buy them once. Be careful – the ends are sharp!
6. Scissors
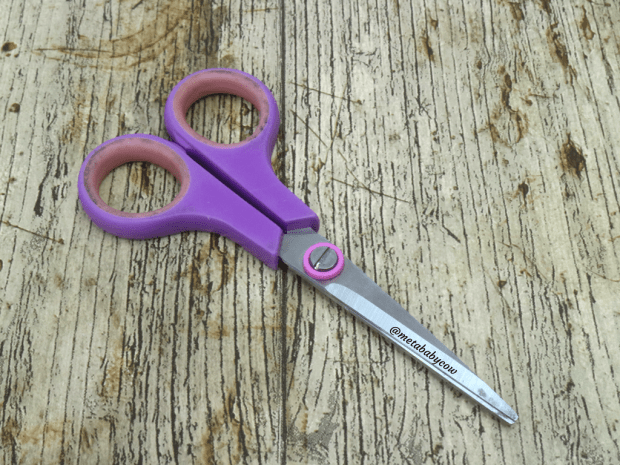
These are to trim your wicks, once your candles are complete. I borrowed mine from my mum 6 years ago and never returned them (sorry mum).
7. Leftover Wax
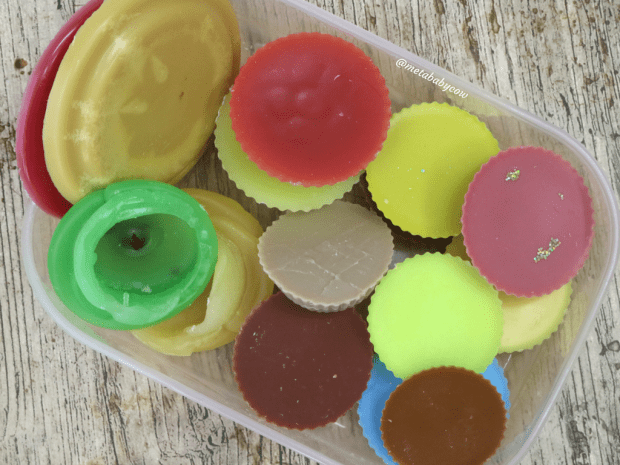
My leftover wax is mostly soy and soy-paraffin blend wax melts from various independent vendors, but there are also some bottoms from Yankee Candle votives in here. If using votives or candle bottoms with the wick bases in, make sure to remove them so they don’t end up in your candle. Any candle wax will work for this – please don’t be an idiot and use anything that isn’t designed to be burned… No leg wax or cleaning products, please.
Also make sure you have a wipe-clean or throwaway surface in case of spillages – I did mine over some PVC fabric which I use for my photography backgrounds, but you could also use newspaper.
Got all your materials? Let’s get started…
Step 1 – Prepare your jar

Pierce the wick with the wicking pin so you can balance it across the top of the candle jar – don’t forget to measure the wick carefully so the pin sits neatly on top of the jar. This is quite fiddly and the pins are sharp, so be careful.
You can also glue the wick down to the bottom of the jar if you want to, to stop it moving around.
Step 2 – Start melting

Choose your first pieces of wax to melt, pop them in a cupcake case and put them in your warmer – don’t forget to switch it on! I had two candle jars prepared, so I could melt two at once.
Wait until the wax is fully melted – you don’t want any lumps left when you pour them into your jars.
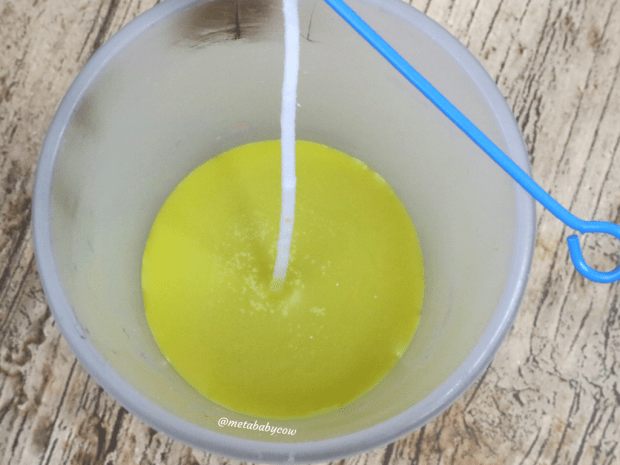
Step 3 – Pour

Once all the wax is fully melted, carefully pour the liquid wax into your prepared jar – work quickly, as it sets fast.

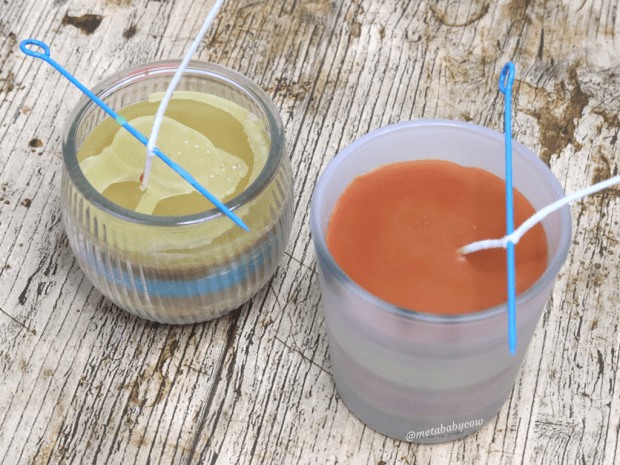
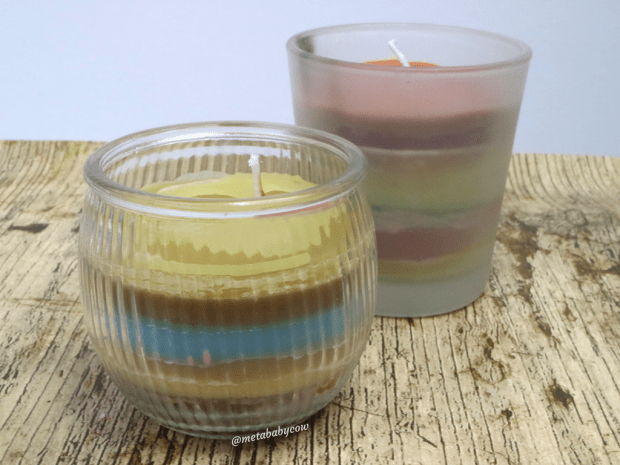
Once the wax is in, be sure to leave it to set completely before pouring in the next layer. When fully set, it will be completely opaque, like this:
This is also the time to re-adjust your wick, if you need to straighten it. You can re-adjust between each layer if need be. Don’t pull it out though!
Step 4 – Repeat as necessary

Continue the melt-and-pour process until you have used all your wax, or the candle jars are full. Don’t overfill them – leave at least a centimetre of space at the top of the jar, so they don’t spill molten wax when you light them.
Some wax melts faster than others – I found my Yankee Candle votives took twice as long to fully melt as the soy wax melts from independent vendors did. Just be patient!

This process took me quite a long time, but most of that was waiting for the wax to melt. I was doing other jobs around the house while waiting for the melting process, and popping in to check on them every now and then. I’m glad I made two at once – you could make more if you had more warmers!
Step 5 – Trim your wicks
Once all the wax has been poured into your jars and set fully, you can trim your wicks and remove the wicking pins. A 1cm wick is all you need on your candle.
Step 6 – You’re done!
Hooray! You just made some candles!
I hope you enjoyed this post and found it informative. If you have any questions, feel free to leave them in the comment section below.
If you make these candles, please tag me on social media so I can see! I’m @metababycow on both Twitter and Instagram.


What a great idea. I love candles! I just generally put any leftover candle wax in a tart warmer just to get that last bit of fragrance. Xx
Toni | sheergloss
LikeLike
Thanks Toni! I do that too – I hate when the wick burns out when there’s still loads of wax left though 😩 xx
LikeLike
This is an awesome idea! It always seems so wasteful when you get those ‘ends’ of candles left in the jar when you think it’s all finished up so I’ll have to try this out! x
Evelyn @ We Were Raised By Wolves
LikeLike
I agree! I hate wastage too! Hope you enjoy the project x
LikeLike
Amazing DIY! So will your new layered candles smell? Since you said those wax melts don’t smell anymore – would it help to add some fragrance into the concoction?
LikeLiked by 1 person
I didn’t even think of that! They haven’t smelt so far, I think adding fragrance oil will make them even better.. I have loads of wax stashed up again to make another one already 😂
LikeLike
But if you use old melts, they don’t do evaporate, so if you make a candle in a solid jar surely it won’t burn down and the wick will just get drowned?
LikeLike
Hey Marion! My reasoning was that the melts have only melted, never burned, as I have never had them adjacent to a naked flame. I did test it by burning both these candles and they did burn down normally, as you would expect candles to 🥰 Of course how well they burned would depend on what the wax melts are made from, but I haven’t had an issue. Thanks for the question!
LikeLike